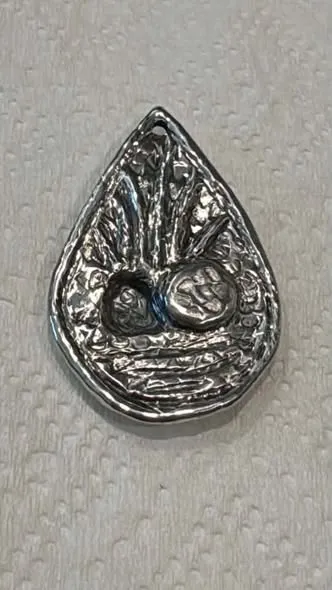
The most important part of this pendant is a hole.
I know how that sounds. But I spent two days hitting a piece of silver with a hammer, and the bit doing all the heavy lifting — the bit that tells you what you’re even looking at — is a small arched dent where I drove the metal down and out of the way. It’s a tomb, and it’s empty. That’s the whole idea.
It didn’t strike me as funny until I was halfway through, hunched over a pan of tar with a chisel in one hand, tapping away a fraction of a millimeter at a time, working extremely hard to produce nothing.
Why a tomb
I should probably say why I picked this, given how many words I’m about to spend on hammers.
I’m sixty-five, and I’ve spent a fair stretch of that arguing with God about one thing or another. But I’m not unsettled about the important part. I know who Jesus is and what he is, and I know he’s the way. That one is finished business.
What draws me to the tomb is that it comes after. After the trial, after the nails, after the worst thing that has ever happened. A great deal of the art goes to the cross and then stays there — Jesus fixed in place, suffering, permanently. I understand why. That was the cost and the cost matters. But I didn’t want to hang it around my wife’s neck, because he isn’t still up there.
The tomb is the part where it’s done. And what makes it mean anything is what isn’t in it: an opening, a stone shoved out of the way, and no one inside.
So that’s what I was trying to get into a piece of metal an inch and a half tall. Not a scene. No figures. A gap, a stone rolled aside, and light coming out of somewhere.
I’m aware that’s a great deal to ask of a hammer.
Where the design came from
The idea was mine: an open tomb, in a teardrop. Past that I was well out of my depth, so I worked the design out in conversation with Claude.
Mostly I wanted help with balance — where the opening sits, how big the stone should be next to it, whether the composition still holds together at the size of a large thumbnail or just turns to mush. But the more valuable half turned out to be the education. I’ve got years of experience with metal and almost none with this particular corner of it. I didn’t know what chasing pitch was, let alone that I could make a batch of it in a frying pan. I didn’t know what shape the punches needed to be, or that liver of sulfur was going to be the step that decided whether the whole thing looked like anything at all.
So I asked, and I read, and I came out the other side with a written plan considerably more thorough than anything I’d have managed alone. Which I then carried around in my head and departed from at every opportunity — partly because of the pitch, mostly because of money. The plan called for seven punches and enough silver for three attempts. I had three punches and a ring that didn’t fit.
That’s the honest shape of it. The design is a collaboration. The mistakes are entirely my own work.
Where the silver came from
Not from a supplier.
A while back I had a silver dollar so worn and beaten up that it wasn’t worth anything past the metal in it. I melted it down, rolled it into half-round wire, and made a ring. The ring came out too small. It then sat in a drawer for a good long while as a small monument to my own measuring.
So when I needed silver for this, I went and got the ring. Cut it up, split it into two roughly equal piles along with a few other odds and ends, melted each one with a pinch of borax until it went liquid and bright, and poured them into a little graphite mold. Two ingots — one destined to be the front, one the back.
I rolled the thicker one down to about the thickness of a heavy business card, annealed it, and sawed it roughly to shape. Behold:
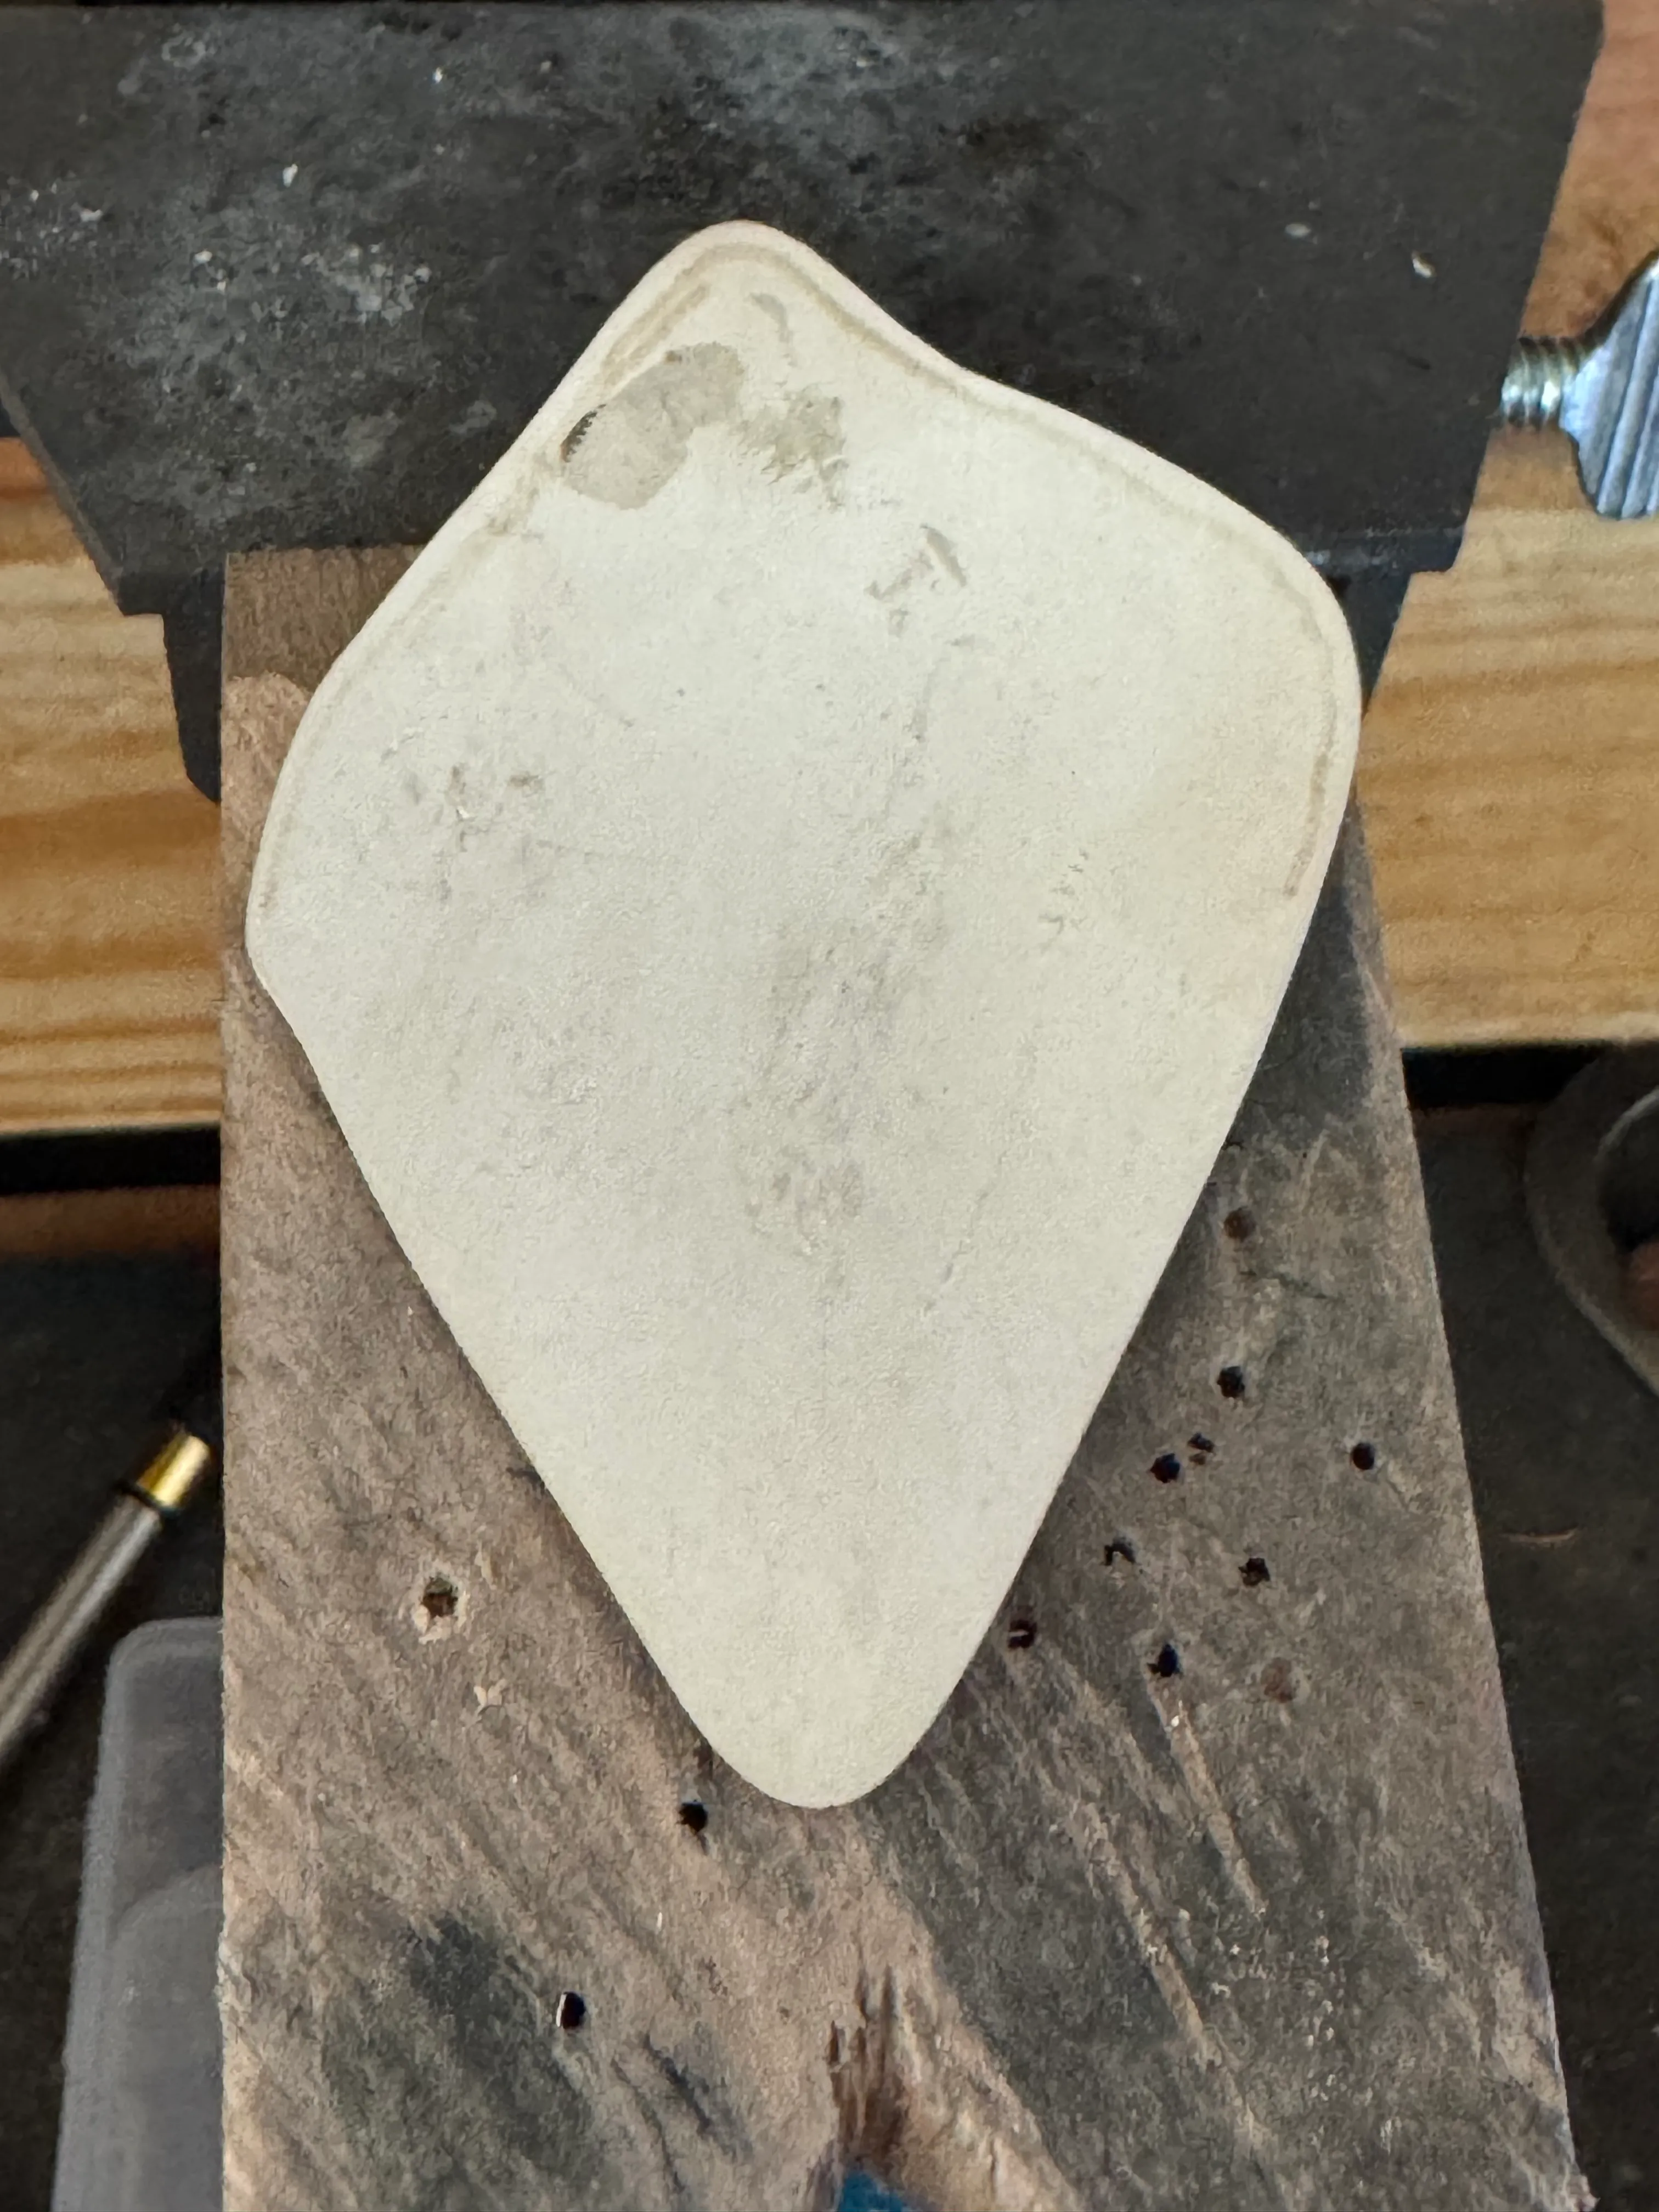
A blank white nothing. By the time I picked up a chisel, that metal was on its third career.
There was only enough for one
This is the fact that shaped everything else, so I’ll get it out of the way early.
Every guide to this kind of work — including the one I wrote for myself before I started, which I then largely ignored — says the same sensible thing. Make three. Expect to throw the first one away. The first attempt is a sacrifice; you learn on it, you wreck it, and you go into the second one with educated hands.
I could barely scrape together enough silver for one.
So there was no version of this where I made a mistake, sighed, and started fresh. Every error was going into the finished object and staying there, on somebody’s neck, in public, indefinitely. I’d like to tell you this made me careful. What it actually made me was slow, and a bit sweaty.
Seeing red in the dark
Silver work-hardens while you beat on it. Push it far enough and it quits moving and starts cracking, so every so often you have to heat it back to soft — annealing — and the way you know it’s ready is the color. You want a dark red.
The trouble is that dark red is basically invisible under shop lights. You’ll swear nothing is happening right up until the moment you find out it did.
So here was my setup: kill the garage lights, pull the door down far enough to block the daylight but not so far that I’m marinating in my own torch fumes, and then stand in the dark watching a piece of metal, like some sort of goblin. It’s a genuinely beautiful thing to watch, in fairness. The color arrives slowly and unevenly, creeping across the surface, and you’re waiting for the whole thing to come up together. Then you shut the torch off and let it sit until the glow dies before you quench it.
I did this a great many times. Nearly every disaster in this kind of work traces back to somebody not doing it enough.
The tools, and the waiting
Chasing needs punches — small blunt steel tools that shove metal around rather than cut it — and it needs pitch, a tar-like bed that holds the work and gives just slightly under the blow. I ordered the pitch ingredients and then had to wait several days for them to turn up.
I am not good at waiting. That is most of the explanation for why I made my own silver instead of buying a sheet like a reasonable person.
I made three punches instead of the seven I’d planned: a liner for drawing lines, a small planisher for flattening things and getting into corners, and a texturing punch whose face I shaped as my own personal interpretation of an oddly shaped rock. I polished all of them well past the point of necessity, because whatever is on the face of the tool gets printed into the silver on every single blow. The traditional test is to drag the tool across the back of your hand. If it catches on skin, it’ll tear metal.
For the round stone beside the tomb I needed something that would print a perfect circle. The proper tool is a length of tube with the end filed flat. What I used was a 9 mm socket on an extension bar out of my mechanic’s tools — a perfect circle with a hardened edge, its own shaft, and a face specifically designed by professionals to be hit with a hammer. It was already in the toolbox. I’d checked the size beforehand on a scrap of copper pipe I’d split, flattened and rolled down, which is how I discovered the diameter I’d originally drawn was too big.
Then the pitch arrived and I got that wrong too.
Pitch is a recipe, and mine was soup
Chasing pitch is rosin, a powdered filler and a little oil, melted together. Mine came out far too soft. I mixed it and used it in a garage in the middle of summer, which — I have since learned — matters enormously. The old shops kept a summer batch and a winter batch, because the same recipe that’s stiff in January is soup in July.
Soft pitch does not have the decency to announce itself. What actually happens is that every blow drives the work a little deeper into the bed instead of being resisted, so the tool never bites the same way twice. What that feels like from where you’re standing is that you have suddenly and inexplicably lost the ability to draw a straight line.
I pressed on for a while under the firm impression that I was simply bad at this. Eventually I gave up, melted the whole pan down again, and added more rosin and considerably more filler by pure kitchen estimation. That batch came out too hard — which, as it turns out, is the correct direction to be wrong in. Too soft is useless. Too hard is one pass with a heat gun away from being right.
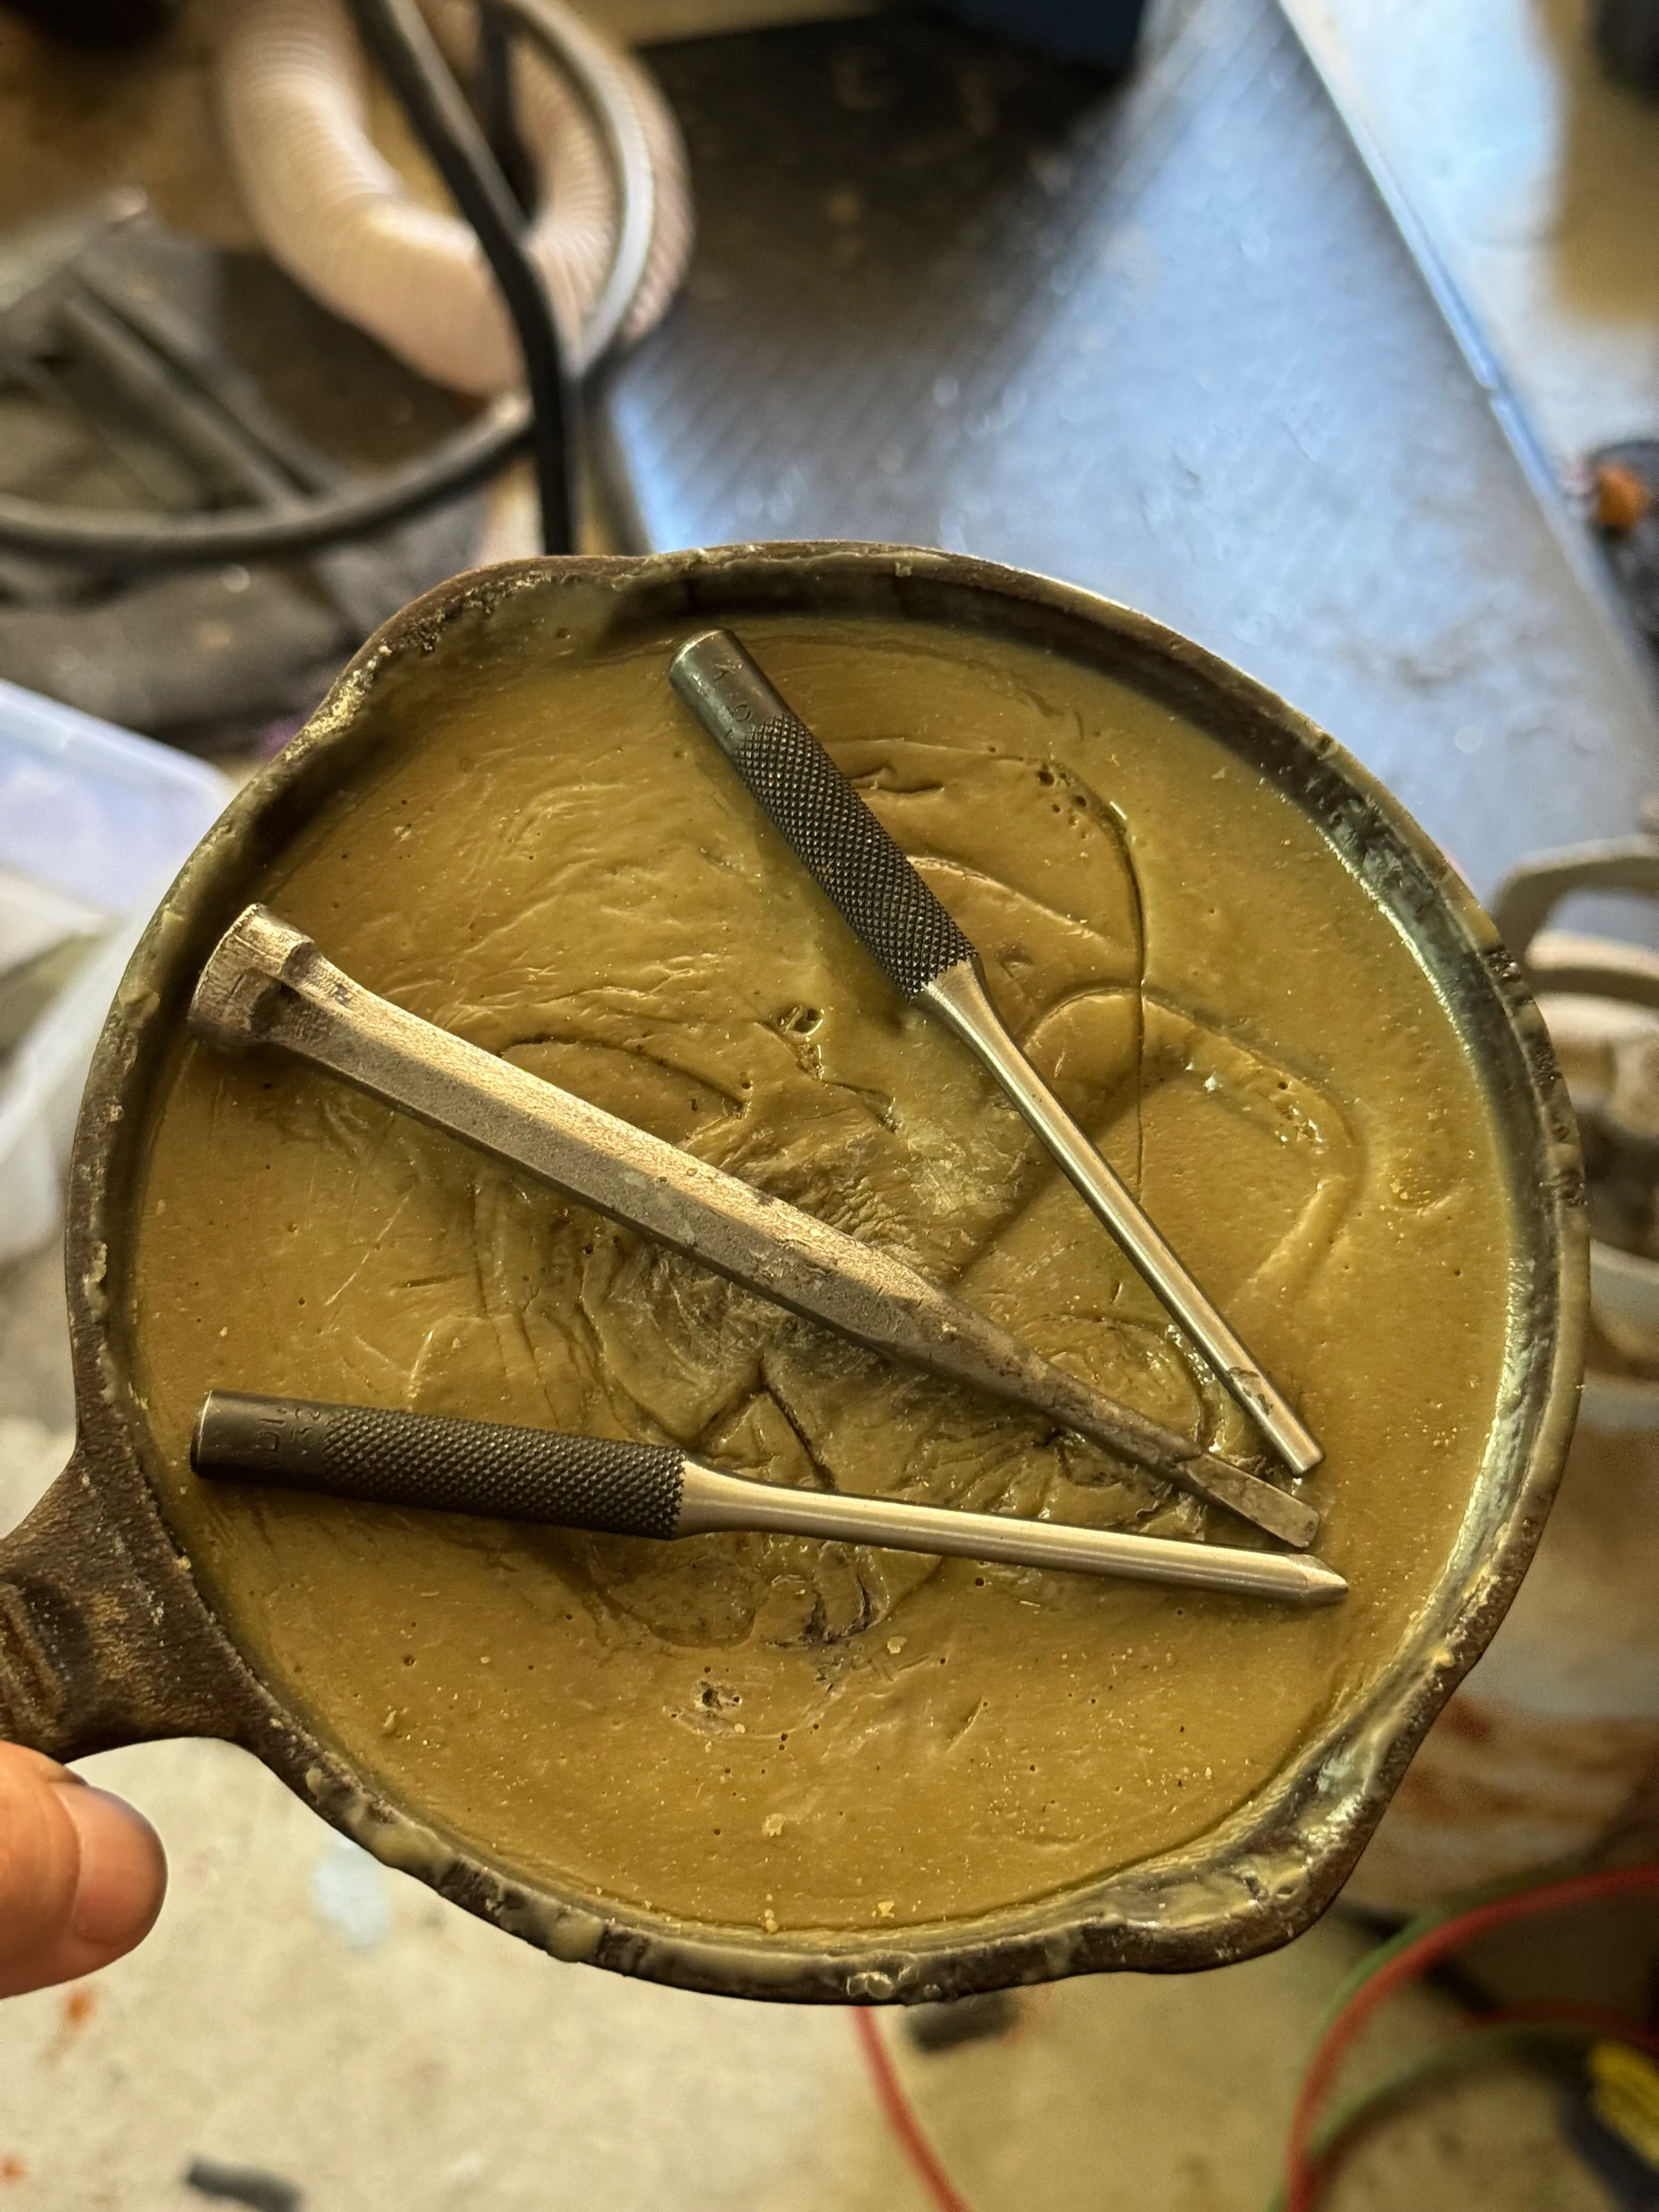
The stiff batch, in a cast iron skillet, with the three punches. It’s due another melt and about a tablespoon of oil, and I’m going to be very disciplined about that tablespoon.
Rays, or branches, or flames
With workable pitch I could finally get on with it. I sank the tomb slowly, a little at a time, so as not to tear the metal, and raised the stone beside it — the one that’s been rolled away — then tucked the metal in alongside so the stone has the appearance of standing in front of the shadow rather than floating on top of it.
Then I put in the ground lines, and the very first one went in crooked.
I should have scribed it first. Scratching a guideline takes ten seconds. I skipped it because I had a hammer in my hand and I was having a nice time. So, with one crooked line now permanently across the bottom of the piece, my options were to start over — which, as established, was not on the menu — or to add more lines and hope they’d look like a group rather than a single mistake with an audience. I added more. It works. Several irregular lines look like strata. One looks like an accident.
The rays fanning up out of the opening got much the same treatment, in that they’re crooked too. I drove those from the back so they’d stand up as raised ridges and catch the light, and they came out wandering enough that I’ve quietly stopped calling them rays. They might be branches. They might be flames. I’ve decided not to have an opinion, which is easier than fixing them and, I suspect, better.
The back
All that sinking and raising leaves the reverse of the piece full of hollows, so a flat back plate would have perched on the high points and rattled. I domed the back with a plastic hammer I’d ground into a shallow curve until it cleared everything.
This solved one problem and immediately produced another. Once the back is curved you can’t just lay it on and solder it flat, so I left the front’s edge long, sawed the outline, and folded that edge down and around the back — treating the whole thing rather like a stone in a bezel, with the front metal wrapped around the back. Then I soldered all the way round the seam.
Two things went wrong, and with admirable efficiency they both went wrong in the same spot. The chasing had stretched the metal unevenly, so by the time I sawed the outline I had less margin at the bottom than anywhere else. And I used a hotter solder than I needed. Thin metal comes up to temperature well before thick metal does, so the thinnest, skinniest bit of that folded edge melted while the rest of the piece was still getting comfortable.
I reflowed it, filed it, sanded it up through the grits, and polished it as far as it would go. The scar is still there if you look. It’s going to stay there.
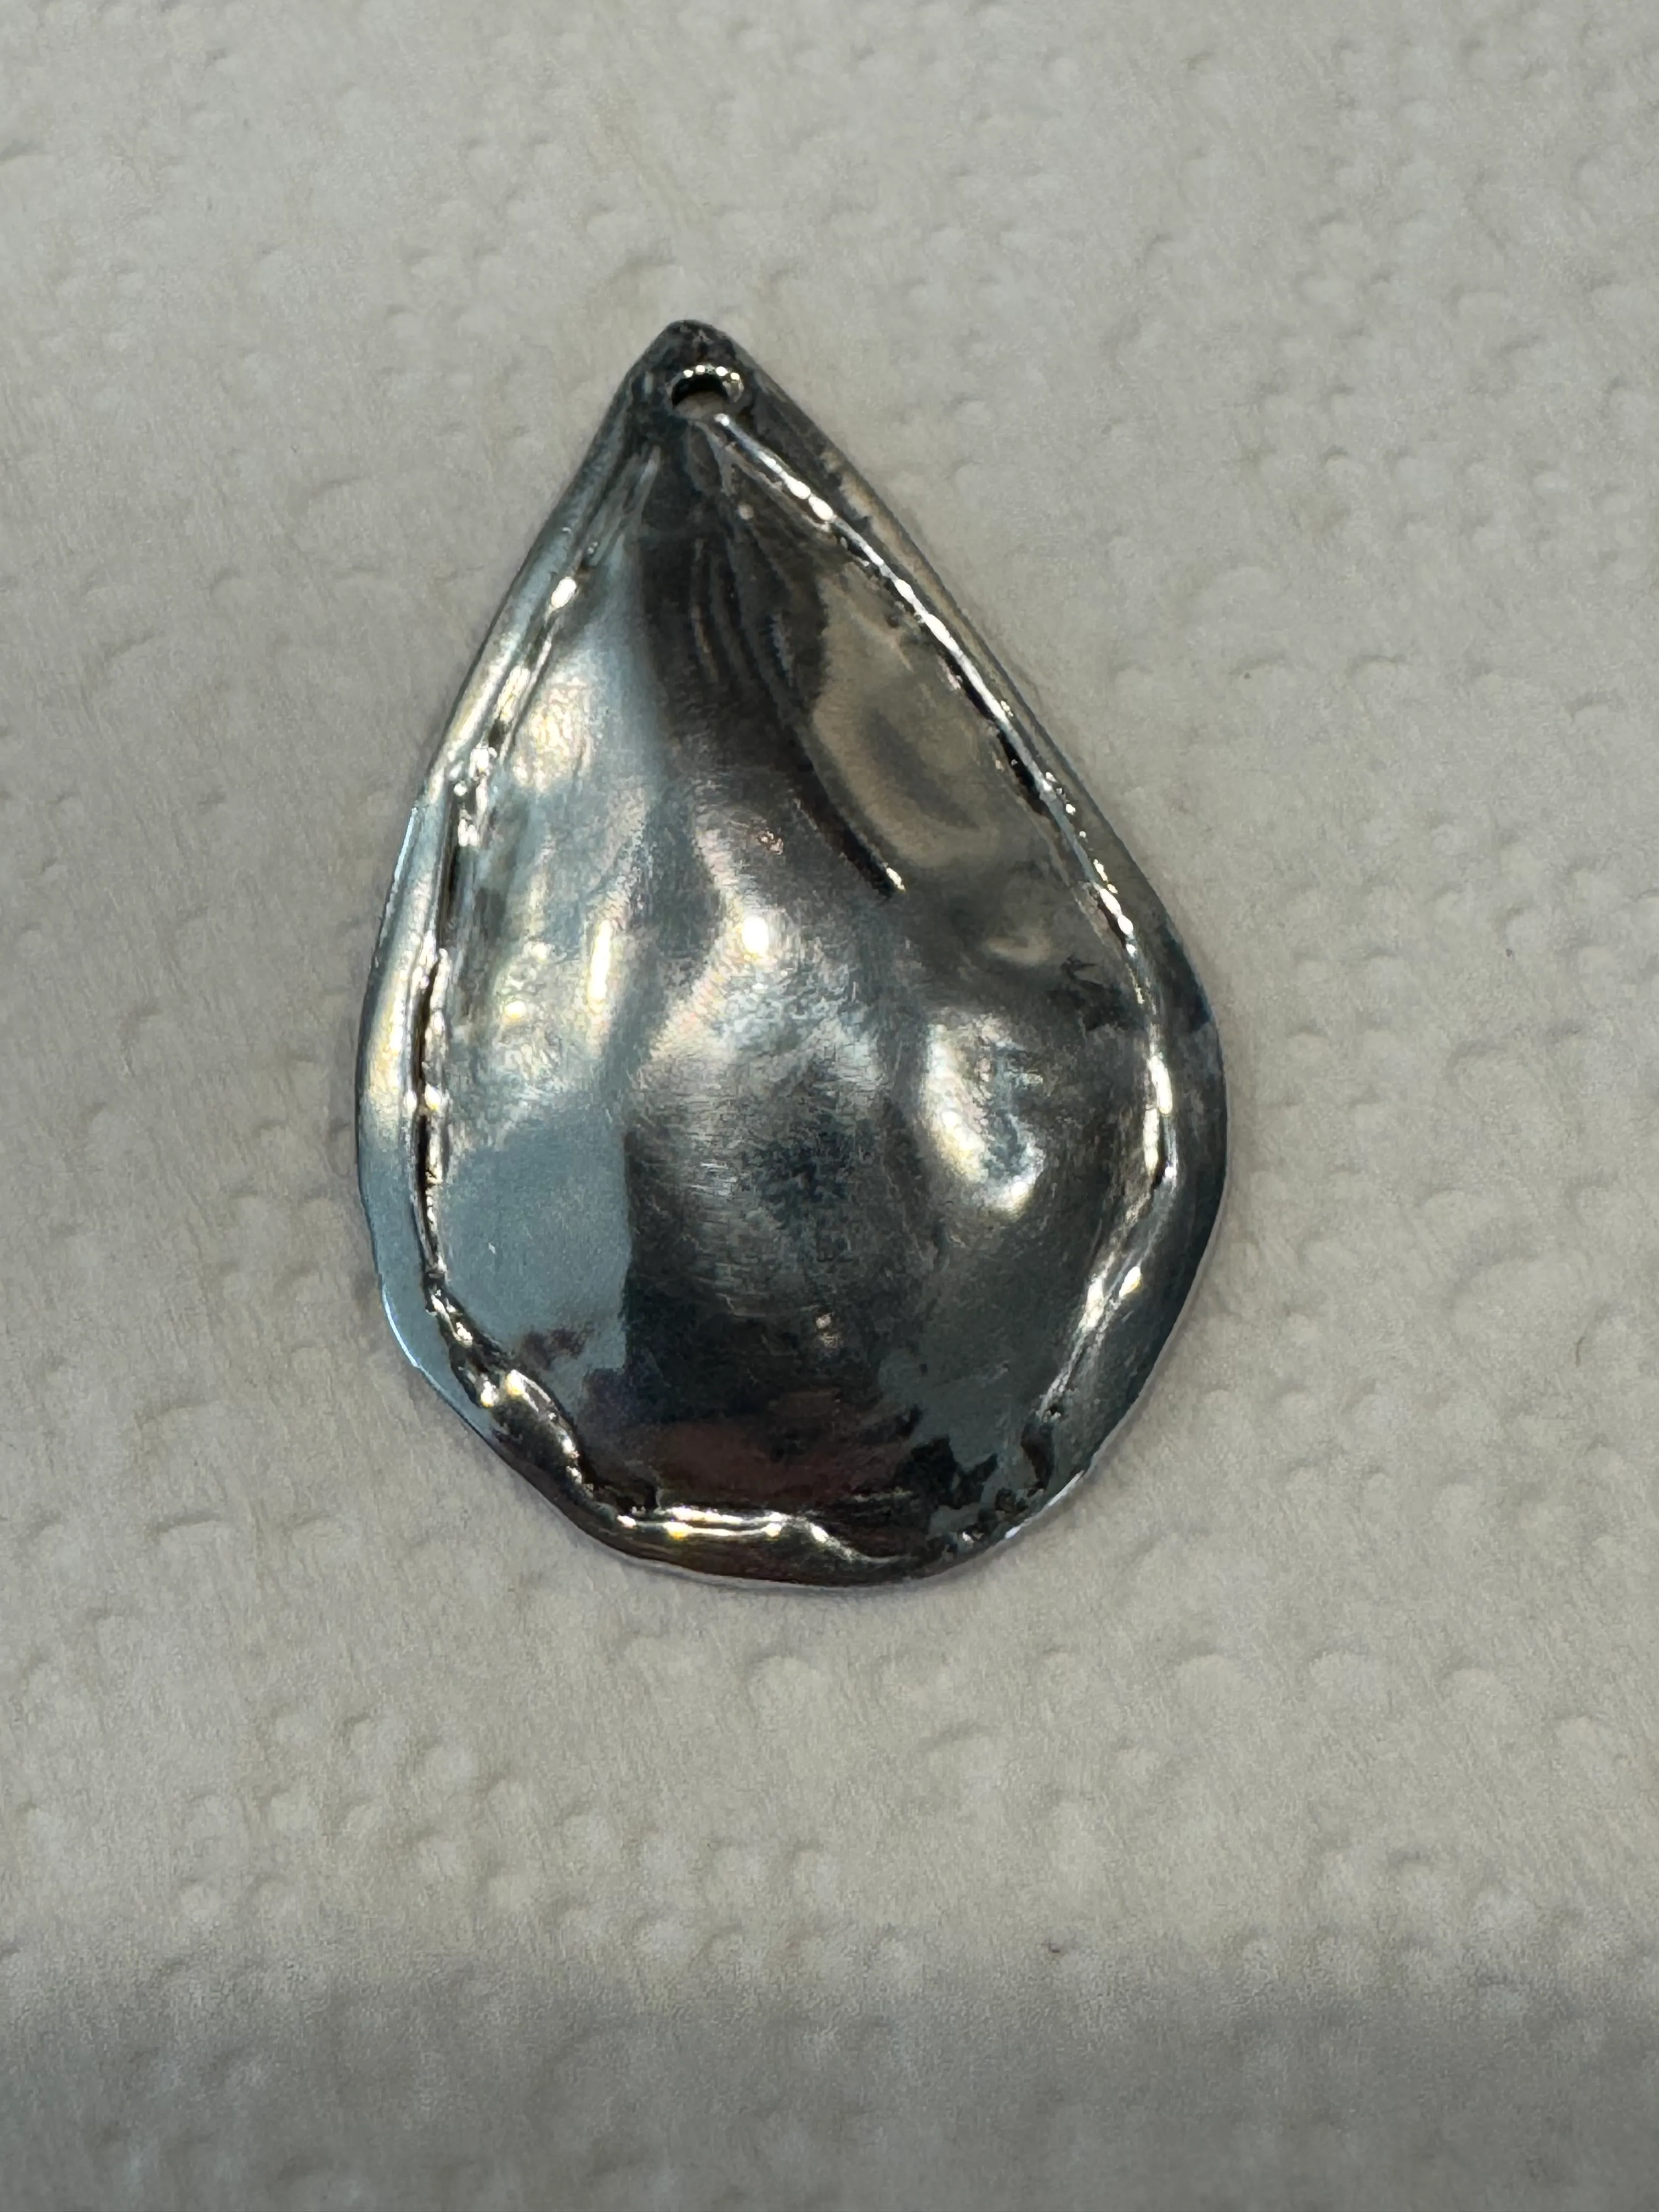
Rustic
Before committing to anything permanent, I colored the entire face in with a black marker to see whether I’d like it dark. This is a real technique and not, as it appears, a grown man defacing his own work with a Sharpie. It shows you exactly what an antiqued finish will look like and wipes off with alcohol if you hate it.
I didn’t hate it. So I finished it in liver of sulfur, which turns silver black in minutes, then polished the raised parts back to bright. That contrast is the entire point of chased work — the light lives up on the ridges, the dark stays down in the tomb — and the piece doesn’t really become itself until that last step.
What I ended up with is a small teardrop of thrice-melted silver with a crooked line across the bottom, rays that may well be branches, a rippled rim and a burn mark I can’t get out. The word for it is rustic, and I’m using that word the way everybody uses it.
But the hole looks right. From across a room you can see that there’s an opening and that something has been rolled away from it, and that’s the thing I set out to make. Everything I got wrong is still there in the metal, and the object is the sum of those, and it turns out I don’t mind.
My wife likes it. I’m going to find a chain and give it to her.
- jewelry
- silversmithing
- diy